
 mongodb+node+express+vue
# 1.所需环境
node:11.15.0
mongodb:3.6.0
express:4.17.1
mongoose:5.12.5
怎么安装就不说了,网上都有教程
# 2.配置文件夹
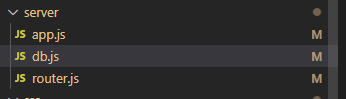
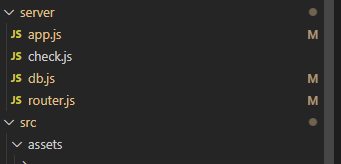
在我的vue项目中创建一个server文件夹,下面有三个文件:
app.js用于入口文件,
db.js用来配置mongodb的相关设置,
router.js用于编写api。
# 3.编写代码
# app.js代码
const express = require('express')
const fs = require('fs')
const path = require('path')
const bodyParse = require('body-parser')
const session = require('express-session')
const MongoStore = require('connect-mongo')(session)
const router = require('./router')
const app = express()

// 访问静态资源文件 这里是访问所有dist目录下的静态资源文件
app.use(express.static(path.resolve(__dirname, '../dist')))

// 下面两个都是中间件,用于解析前端传过来的数据
app.use(bodyParse.json()) // 解析json格式的数据
app.use(bodyParse.urlencoded({ // 解析form表单提交的数据
  extended: true
}))
app.use(router)

// 在数据库中存放cookie
app.set('trust proxy', 1) // trust first proxy
app.use(session({
  secret: 'dailylife',
  resave: false,
  saveUninitialized: true,
  cookie: {
    secure: true,
    maxAge: 2592000000
  },
  store: new MongoStore({
    url: 'mongodb://localhost:27017/数据库名'
  })
}))

//设置跨域请求
app.all('*', function (req, res, next) {
  res.header("Access-Control-Allow-Origin", "*");
  res.header('Access-Control-Allow-Headers', 'Content-Type, Content-Length, Authorization, Accept, X-Requested-With , yourHeaderFeild');
  res.header("Access-Control-Allow-Methods", "PUT,POST,GET,DELETE,OPTIONS");
  res.header("X-Powered-By", ' 3.2.1')
  res.header("Content-Type", "application/json;charset=utf-8");
  next();
});

app.get('*', function (req, res) {
  const html = fs.readFileSync(path.resolve(__dirname, '../dist/index.html'), 'utf-8')
  res.send(html)
})

// 监听3000端口
app.listen(3000, function () {
  console.log('访问地址为 localhost:3000')
})
1
2
3
4
5
6
7
8
9
10
11
12
13
14
15
16
17
18
19
20
21
22
23
24
25
26
27
28
29
30
31
32
33
34
35
36
37
38
39
40
41
42
43
44
45
46
47
48
49
50
51
52
53
2
3
4
5
6
7
8
9
10
11
12
13
14
15
16
17
18
19
20
21
22
23
24
25
26
27
28
29
30
31
32
33
34
35
36
37
38
39
40
41
42
43
44
45
46
47
48
49
50
51
52
53
# db.js代码
//引入 mongoose
const mongoose = require('mongoose');

// 连接数据库 如果不自己创建 默认test数据库会自动生成
mongoose.connect('mongodb://127.0.0.1:27017/数据库名');

// 为这次连接绑定事件,用来提示是否连接成功
const db = mongoose.connection;
db.once('error', () => console.log('Mongo connection error'));
db.once('open', () => console.log('Mongo connection successed'));

// 定义数据库中的表在文档中的格式
const userSchema = new mongoose.Schema({
  name: String,
  password: String
})

const homeSchema = new mongoose.Schema({
  title: String,
  status: Boolean,
  sort: Number,
  type: String,
  icon: String,
})

const Models = {
  User: mongoose.model('User', userSchema),
  Home: mongoose.model('Home', homeSchema)
}

module.exports = Models
1
2
3
4
5
6
7
8
9
10
11
12
13
14
15
16
17
18
19
20
21
22
23
24
25
26
27
28
29
30
31
2
3
4
5
6
7
8
9
10
11
12
13
14
15
16
17
18
19
20
21
22
23
24
25
26
27
28
29
30
31
# router.js代码
const express = require('express')
const router = express.Router()
const db = require('./db')

// 注册
router.post('/api/user/signup', function (req, res) {
  new db.User(req.body.userInfo).save(function (err) {
    if (err) {
      res.status(500).send()
      return
    }
    res.send()
  })
})

// 登录
router.post('/api/user/signin', function (req, res) {
  // req.session.user = req.body.userInfo
  res.send(res)
})

// 根据用户名获取用户
router.get('/api/admin/getUser/:name', function (req, res) {
  db.User.findOne({
    name: req.params.name
  }, function (err, docs) {
    if (err) {
      console.error(err)
      return
    }
    res.send(docs)
  })
})

// 获取数据
router.get('/api/home/dataList', function (req, res) {
  db.Home.find({}, function (err, docs) {
    if (err) {
      console.error(err)
      return
    }
    res.json(docs)
  })
})

// 增加数据
router.post('/api/home/add', function (req, res) {
  new db.Home(req.body.taskInformation).save(function (err) {
    if (err) {
      res.status(500).send()
      return
    }
    res.send()
  })
})

// 删除数据
router.post('/api/home/delete', function (req, res) {
  db.Home.deleteOne({
    _id: req.body._id
  }, function (err) {
    if (err) {
      res.status(500).send()
      return
    }
    res.send()
  })
})

// 更改数据
router.post('/api/home/update', function (req, res) {
  let info = req.body.taskInformation
  db.Home.find({
    _id: info._id
  }, function (err, docs) {
    if (err) {
      return
    }
    docs[0].title = info.title
    docs[0].status = info.status
    docs[0].sort = info.sort
    docs[0].type = info.type
    docs[0].icon = info.icon
    db.Home(docs[0]).save(function (err) {
      if (err) {
        res.status(500).send()
        return
      }
      res.send()
    })
  })
})

// 查找数据
router.get('/api/home/detail/:id', function (req, res) {
  db.Home.findOne({
    _id: req.params.id
  }, function (err, docs) {
    if (err) {
      console.error(err)
      return
    }
    res.send(docs)
  })
})

module.exports = router
1
2
3
4
5
6
7
8
9
10
11
12
13
14
15
16
17
18
19
20
21
22
23
24
25
26
27
28
29
30
31
32
33
34
35
36
37
38
39
40
41
42
43
44
45
46
47
48
49
50
51
52
53
54
55
56
57
58
59
60
61
62
63
64
65
66
67
68
69
70
71
72
73
74
75
76
77
78
79
80
81
82
83
84
85
86
87
88
89
90
91
92
93
94
95
96
97
98
99
100
101
102
103
104
105
106
107
# 4.启动服务
# 启动mongodb服务端
在mongodb的bin文件夹下执行以下命令:
mongod --dbpath D:\MongoDB\mongoDBdata
1
# 启动客户端
启动服务端后,同样的在bin文件夹下再开一个命令窗口执行:
mongo
1
# 运行后端代码
cd 到server文件夹:
node app
1
# 运行前端代码
npm run dev
1
# 5.开始使用
# 简单封装一下axios
// request.js
import axios from 'axios'

export function request(config) {
  const instance = axios.create({
    baseURL: '/api',
    timeout: 5000
  })

  instance.interceptors.request.use(config => {
    return config
  }, err => {})

  instance.interceptors.response.use(res => {
    return res.data
  }, err => {
    console.log(err)
  })

  return instance(config)
}
1
2
3
4
5
6
7
8
9
10
11
12
13
14
15
16
17
18
19
20
21
2
3
4
5
6
7
8
9
10
11
12
13
14
15
16
17
18
19
20
21
# 写请求
// api.js
import {
  request
} from "./request";


// 获取数据
export function getHomeDataList() {
  return request({
    url: '/home/dataList',
    method: 'get',
  })
}

// 增加数据
export function addHomeData(data) {
  return request({
    url: '/home/add',
    method: 'post',
    data,
  })
}

// ......
1
2
3
4
5
6
7
8
9
10
11
12
13
14
15
16
17
18
19
20
21
22
23
24
2
3
4
5
6
7
8
9
10
11
12
13
14
15
16
17
18
19
20
21
22
23
24
# 在vue项目中使用
methods:{
    // 获取数据
    async getHomeListData() {
      const res = await getHomeDataList();
      console.log(res);
    },
     // 添加数据
    async addHomeData() {
      let obj = {
        _id: "607fe4d755a2b5428837168f",
        title: "大帅逼",
        status: false,
        sort: 0,
        icon: '<use xlink:href="#icon-wenping"></use>',
        type: "t1",
      };
        // 这边的taskInformation属性(可以自定义)要与router.js中的要对应
      const res = await addHomeData({ taskInformation: obj });
    },
}
1
2
3
4
5
6
7
8
9
10
11
12
13
14
15
16
17
18
19
20
2
3
4
5
6
7
8
9
10
11
12
13
14
15
16
17
18
19
20
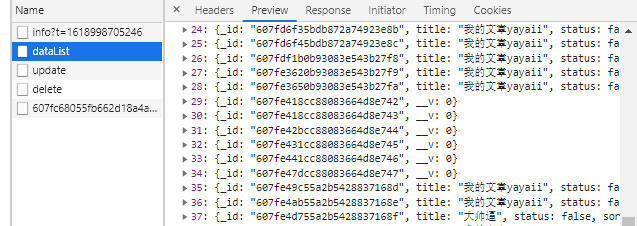
最终效果如下:
# 6.跨域问题
# 第一步,在express入口文件中添加以下代码:
//设置跨域请求
app.all('*', function (req, res, next) {
  res.header("Access-Control-Allow-Origin", "*");
  res.header('Access-Control-Allow-Headers', 'Content-Type, Content-Length, Authorization, Accept, X-Requested-With , yourHeaderFeild');
  res.header("Access-Control-Allow-Methods", "PUT,POST,GET,DELETE,OPTIONS");
  res.header("X-Powered-By", ' 3.2.1')
  res.header("Content-Type", "application/json;charset=utf-8");
  next();
});
1
2
3
4
5
6
7
8
9
2
3
4
5
6
7
8
9
# 第二步,在vue.config.js中添加以下代码:
const webpack = require('webpack')
module.exports = {
  // 基本路径
  publicPath: './',
  // 输出文件目录
  outputDir: 'dist',
  configureWebpack: {
    resolve: {
      alias: {}
    },
    devServer: {
      historyApiFallback: true,
      noInfo: true,
      //让前后端http请求都转到node的3000端口,而不是前端的8080端口
      proxy: {
        '/api': {
          target: 'http://localhost:3000',
          changeOrigin: true, // 是否改变域名
        }
      }
    },
  }
}
axios请求中的baseUrl要改成:
baseURL: '/api',
1
2
3
4
5
6
7
8
9
10
11
12
13
14
15
16
17
18
19
20
21
22
23
24
25
2
3
4
5
6
7
8
9
10
11
12
13
14
15
16
17
18
19
20
21
22
23
24
25
在GitHub上编辑 (opens new window)
上次更新: 4/27/2021, 11:18:01 AM